Introduction
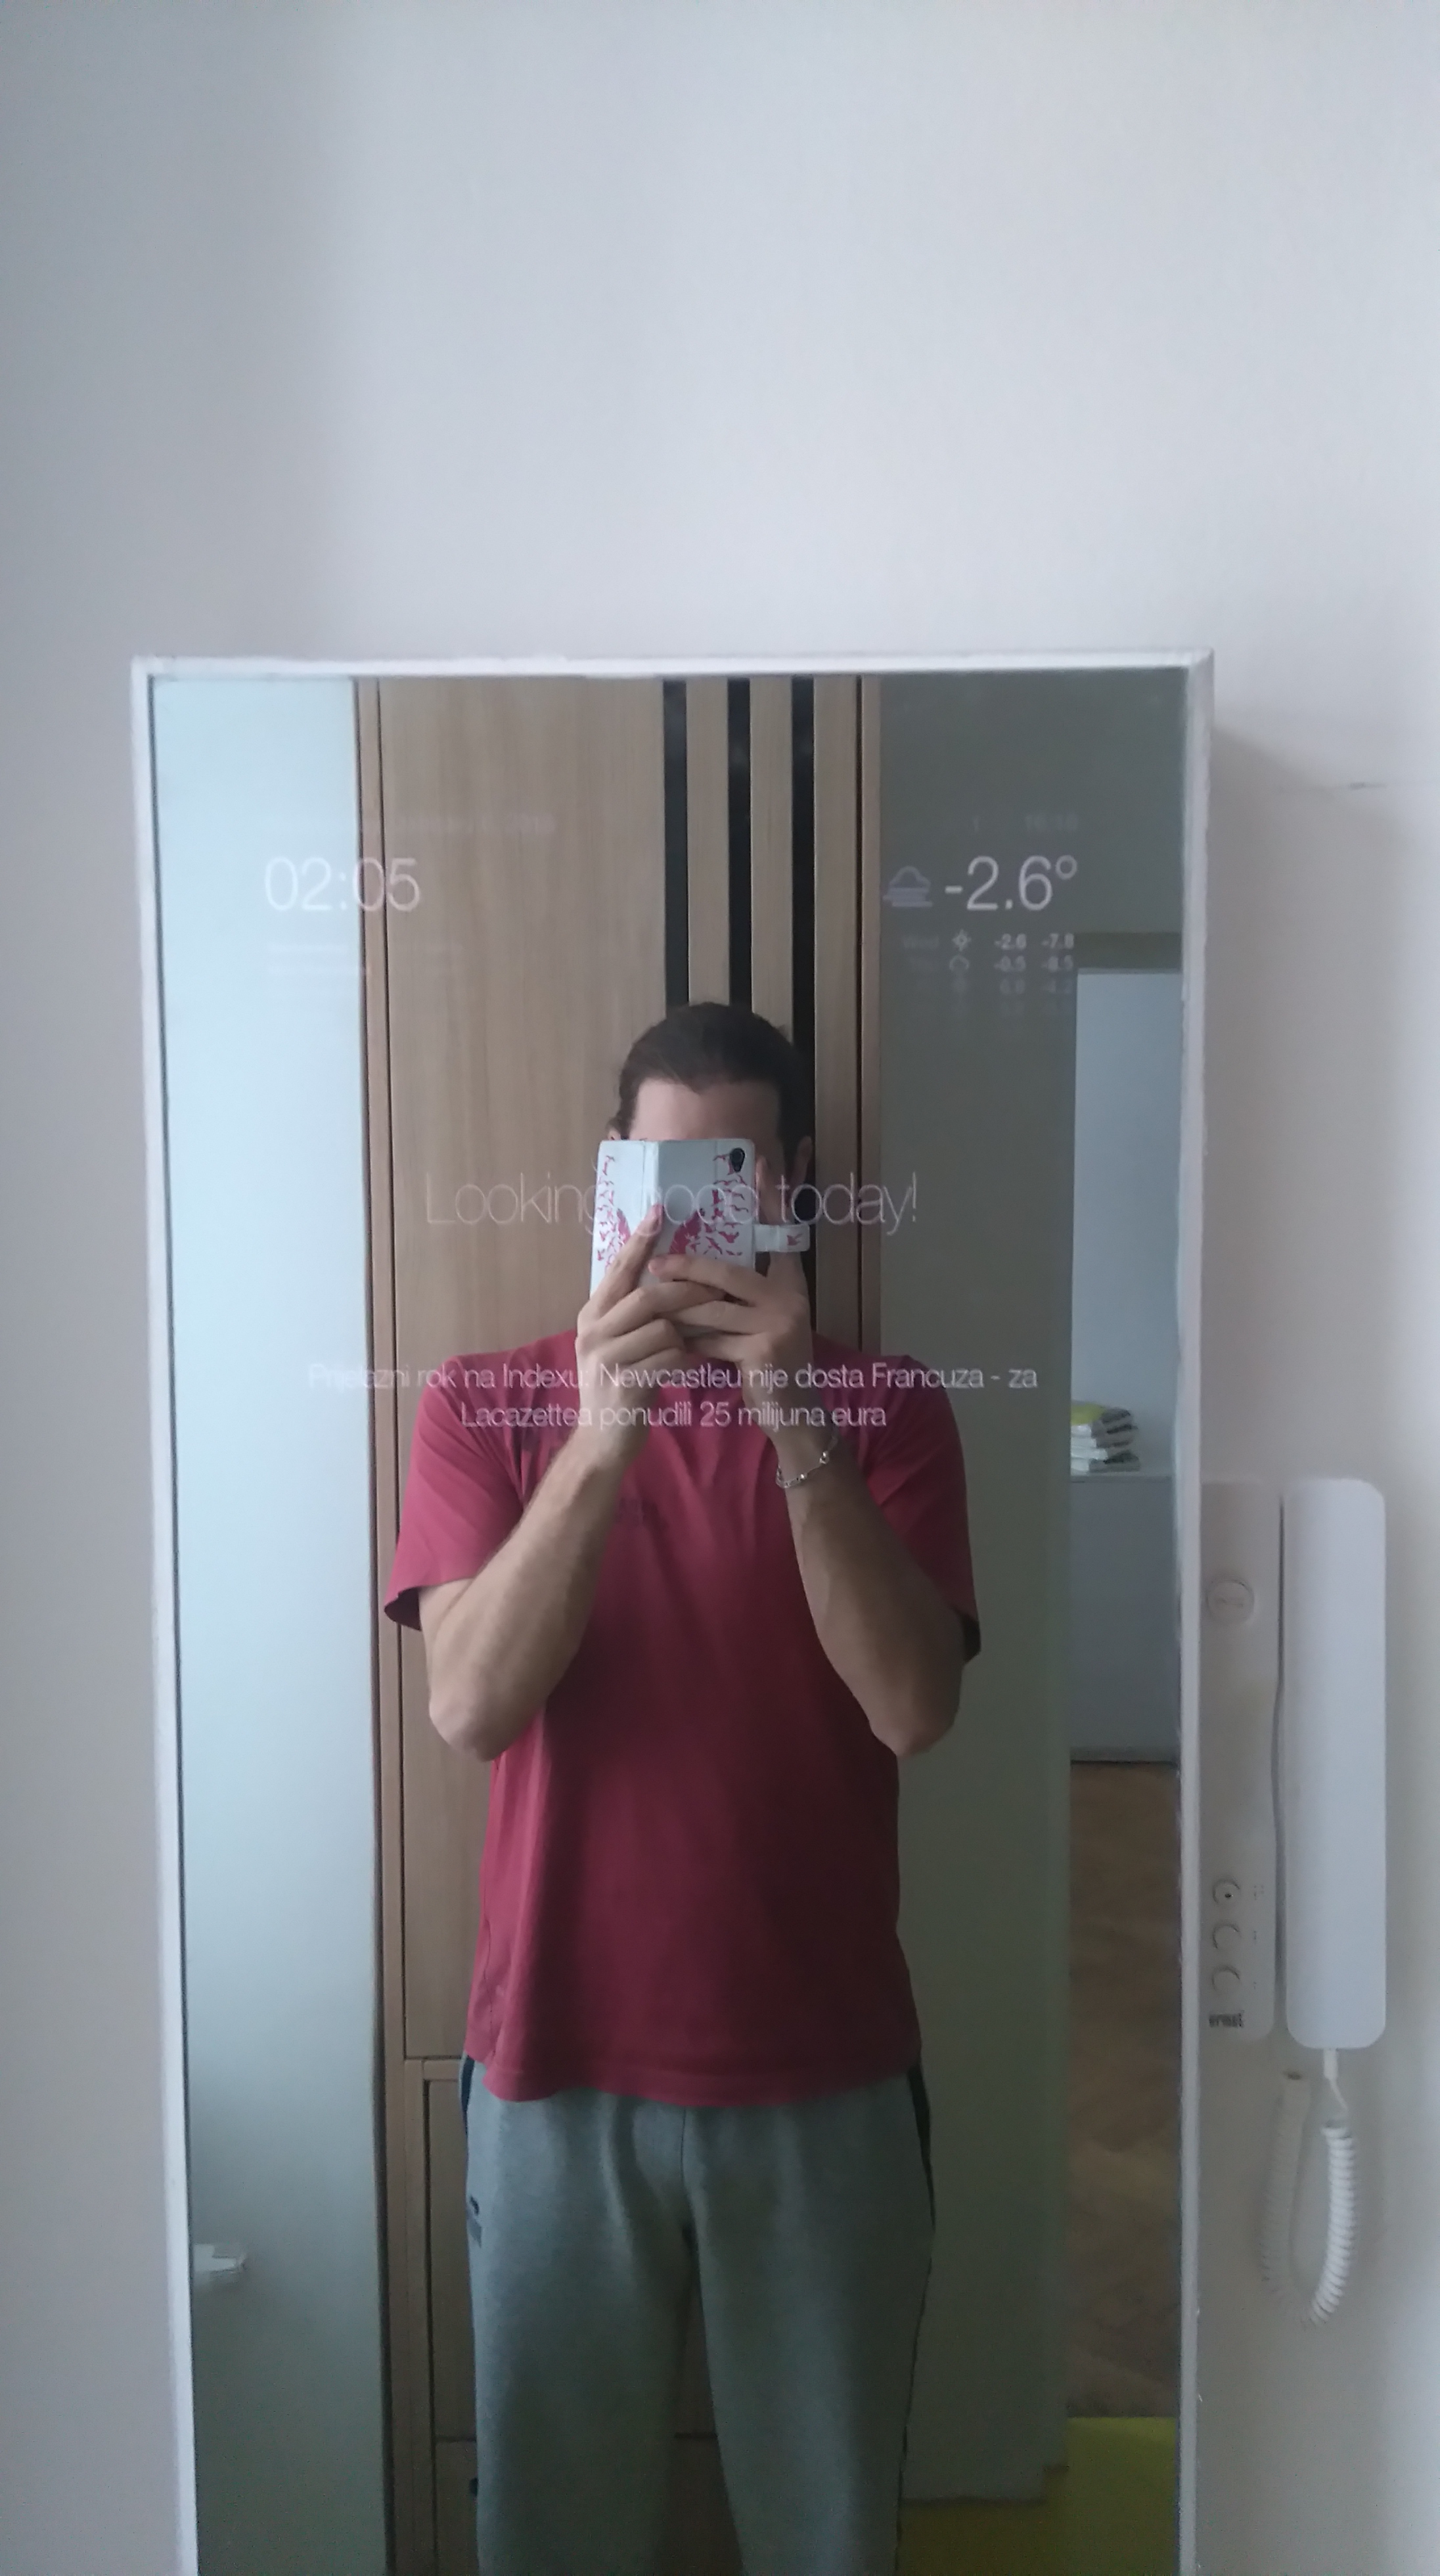
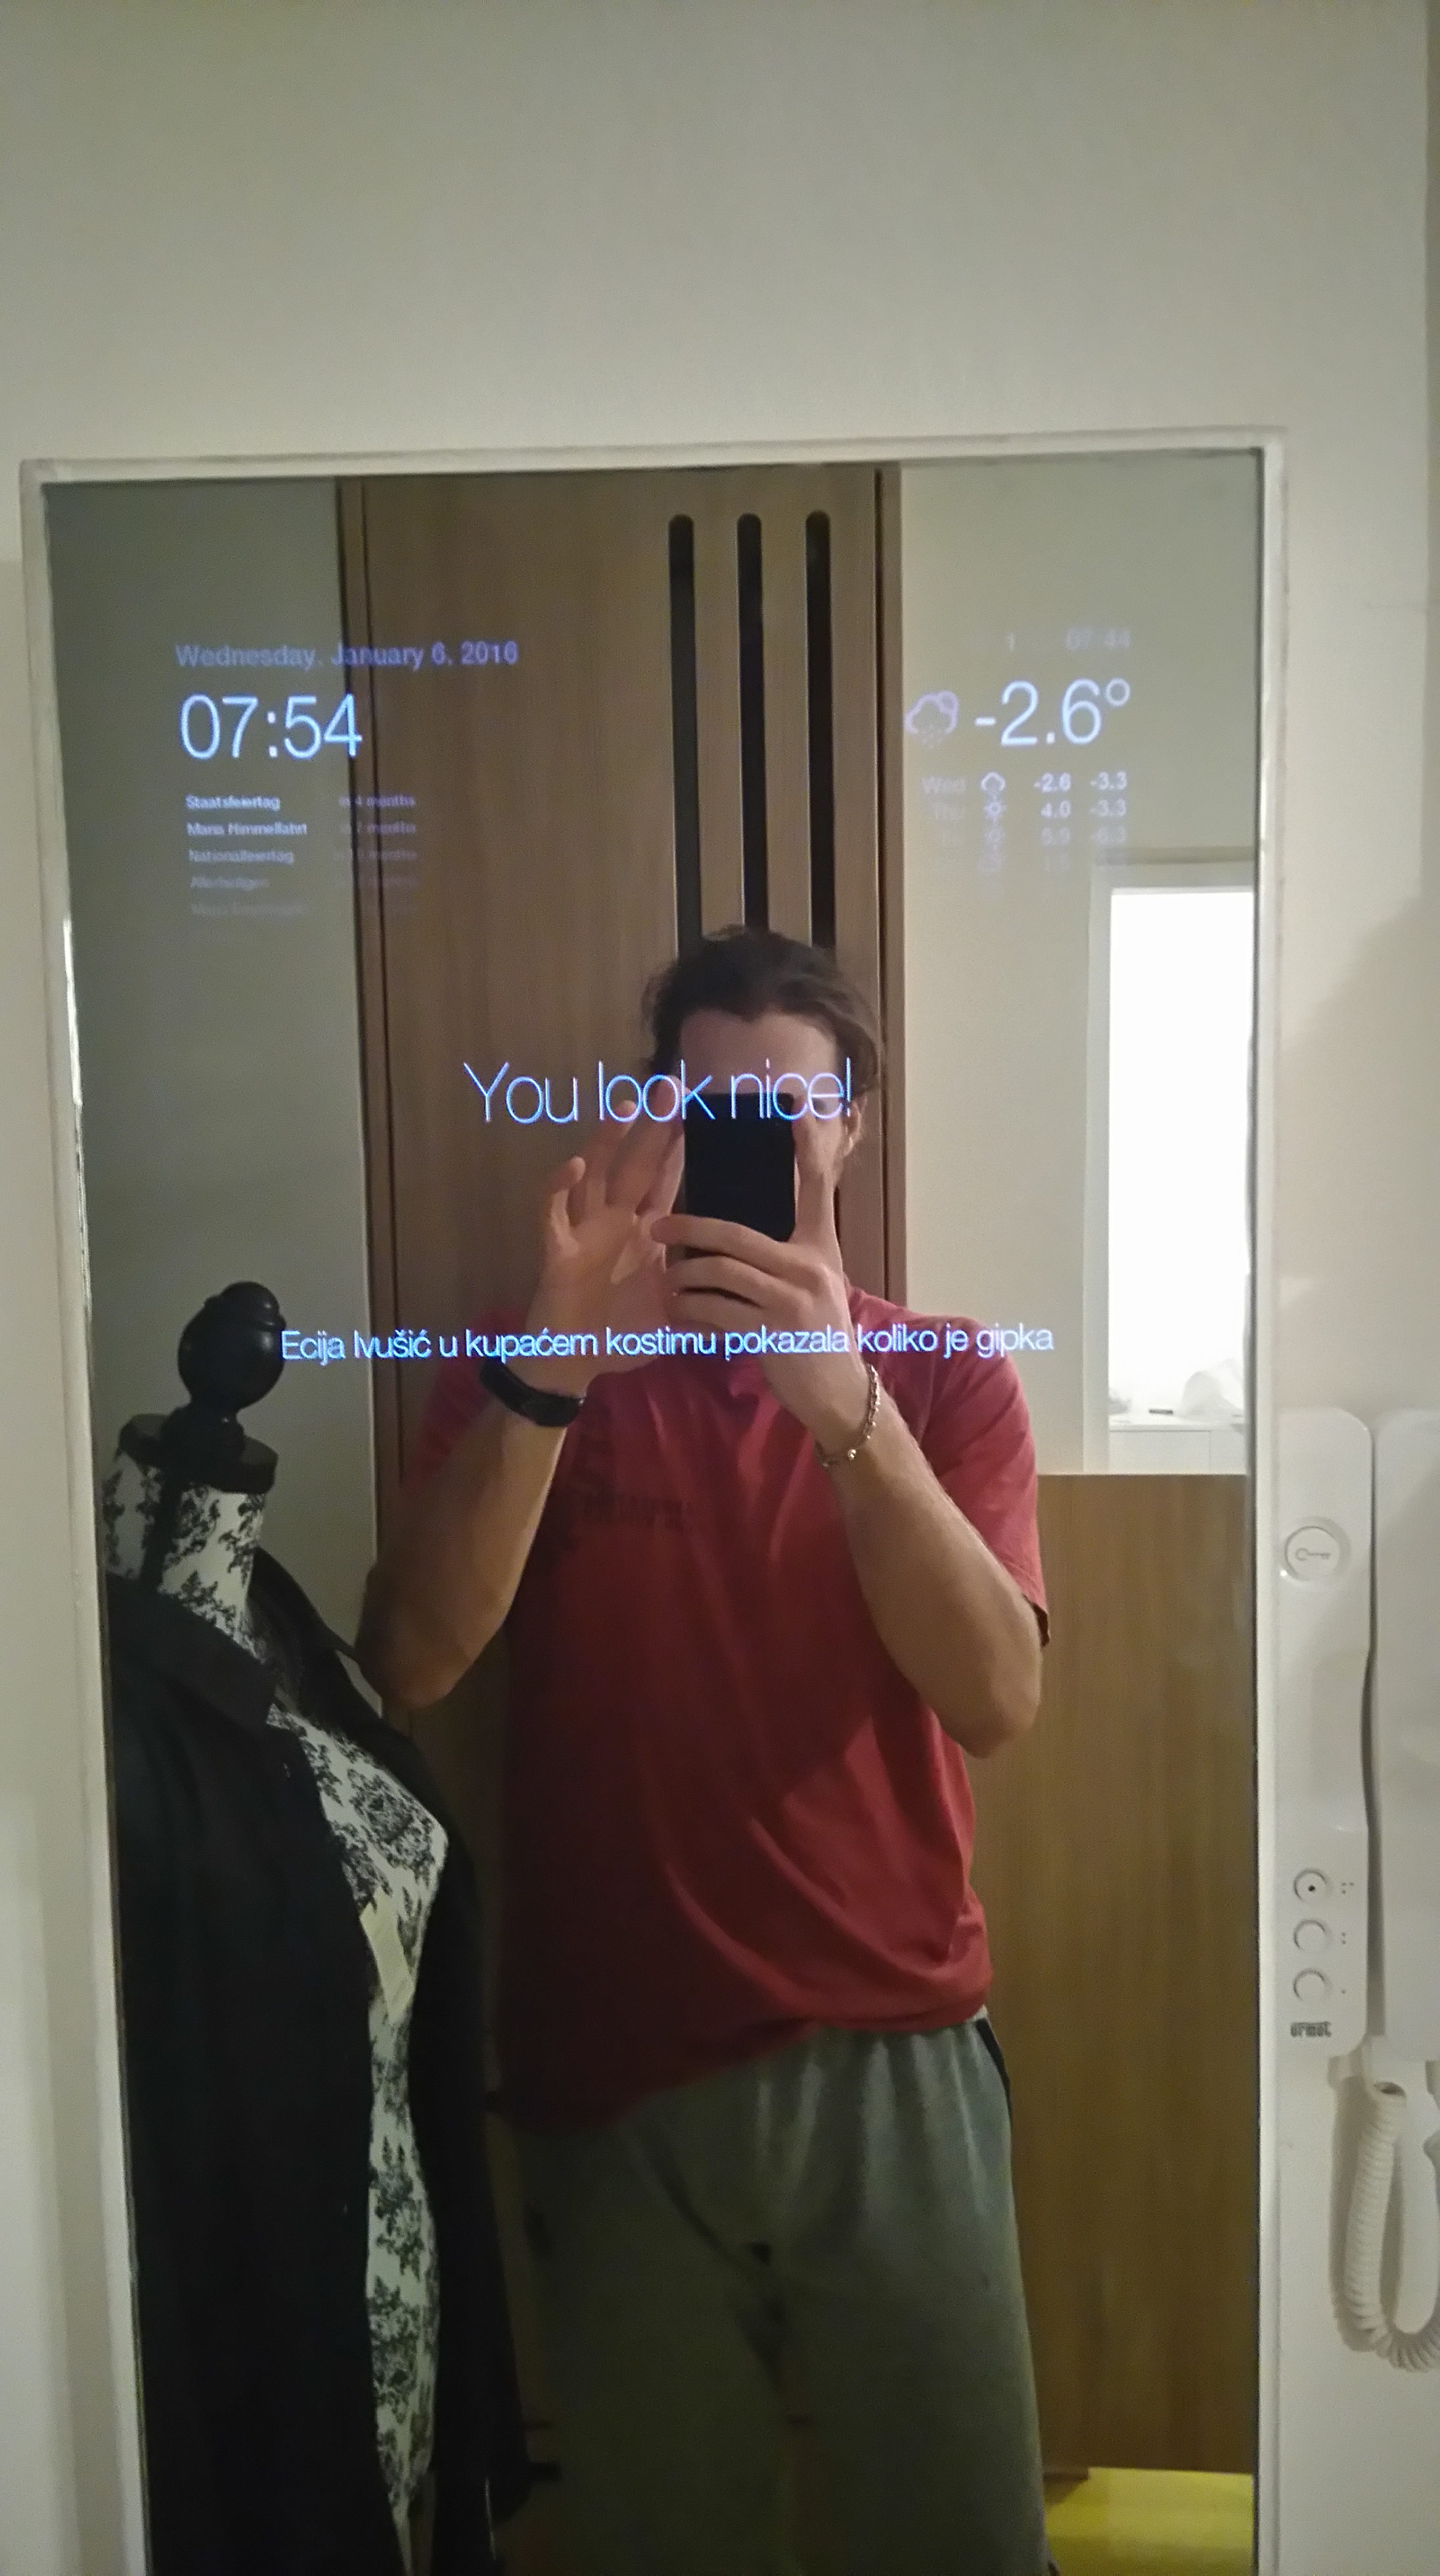
I’ve had a desire to learn to work with Raspberry Pi since, like, forever. What better way to learn it than by trying out some DIY project? One of the most popular ones I’ve found around is brilliant Magic Mirror by Michael Teeuw: it’s a mirror that displays some useful info (in.e. time, forecast, news etc.) in a very stylish-looking way and gives your home a classy appeal. The only issue I had with it is that it is always on, even when there is noone around – which can be quite troublesome for your electricity bill. That’s why I decided to incorporate a simple motion detector to turn the mirror on and off, depending on whether there is somebody in the house.
R Pi and Magic Mirror set-up
 There are plenty of tutorials on how to set up a Raspberry Pi, install Linux a system and get it started. Michael Teeuw also provided a step-by-step tutorial on how to set-up his Magic Mirror and gave his code for everybody to use. Perhaps the most useful tutorial for beginners is the one I found on reddit, by user The-Bent that shows an ultimate how-to guide on Michael’s mirror. So, let’s get started! The things I needed:
- Raspberry Pi (any version), accompanying SD card and a WiFi dongle
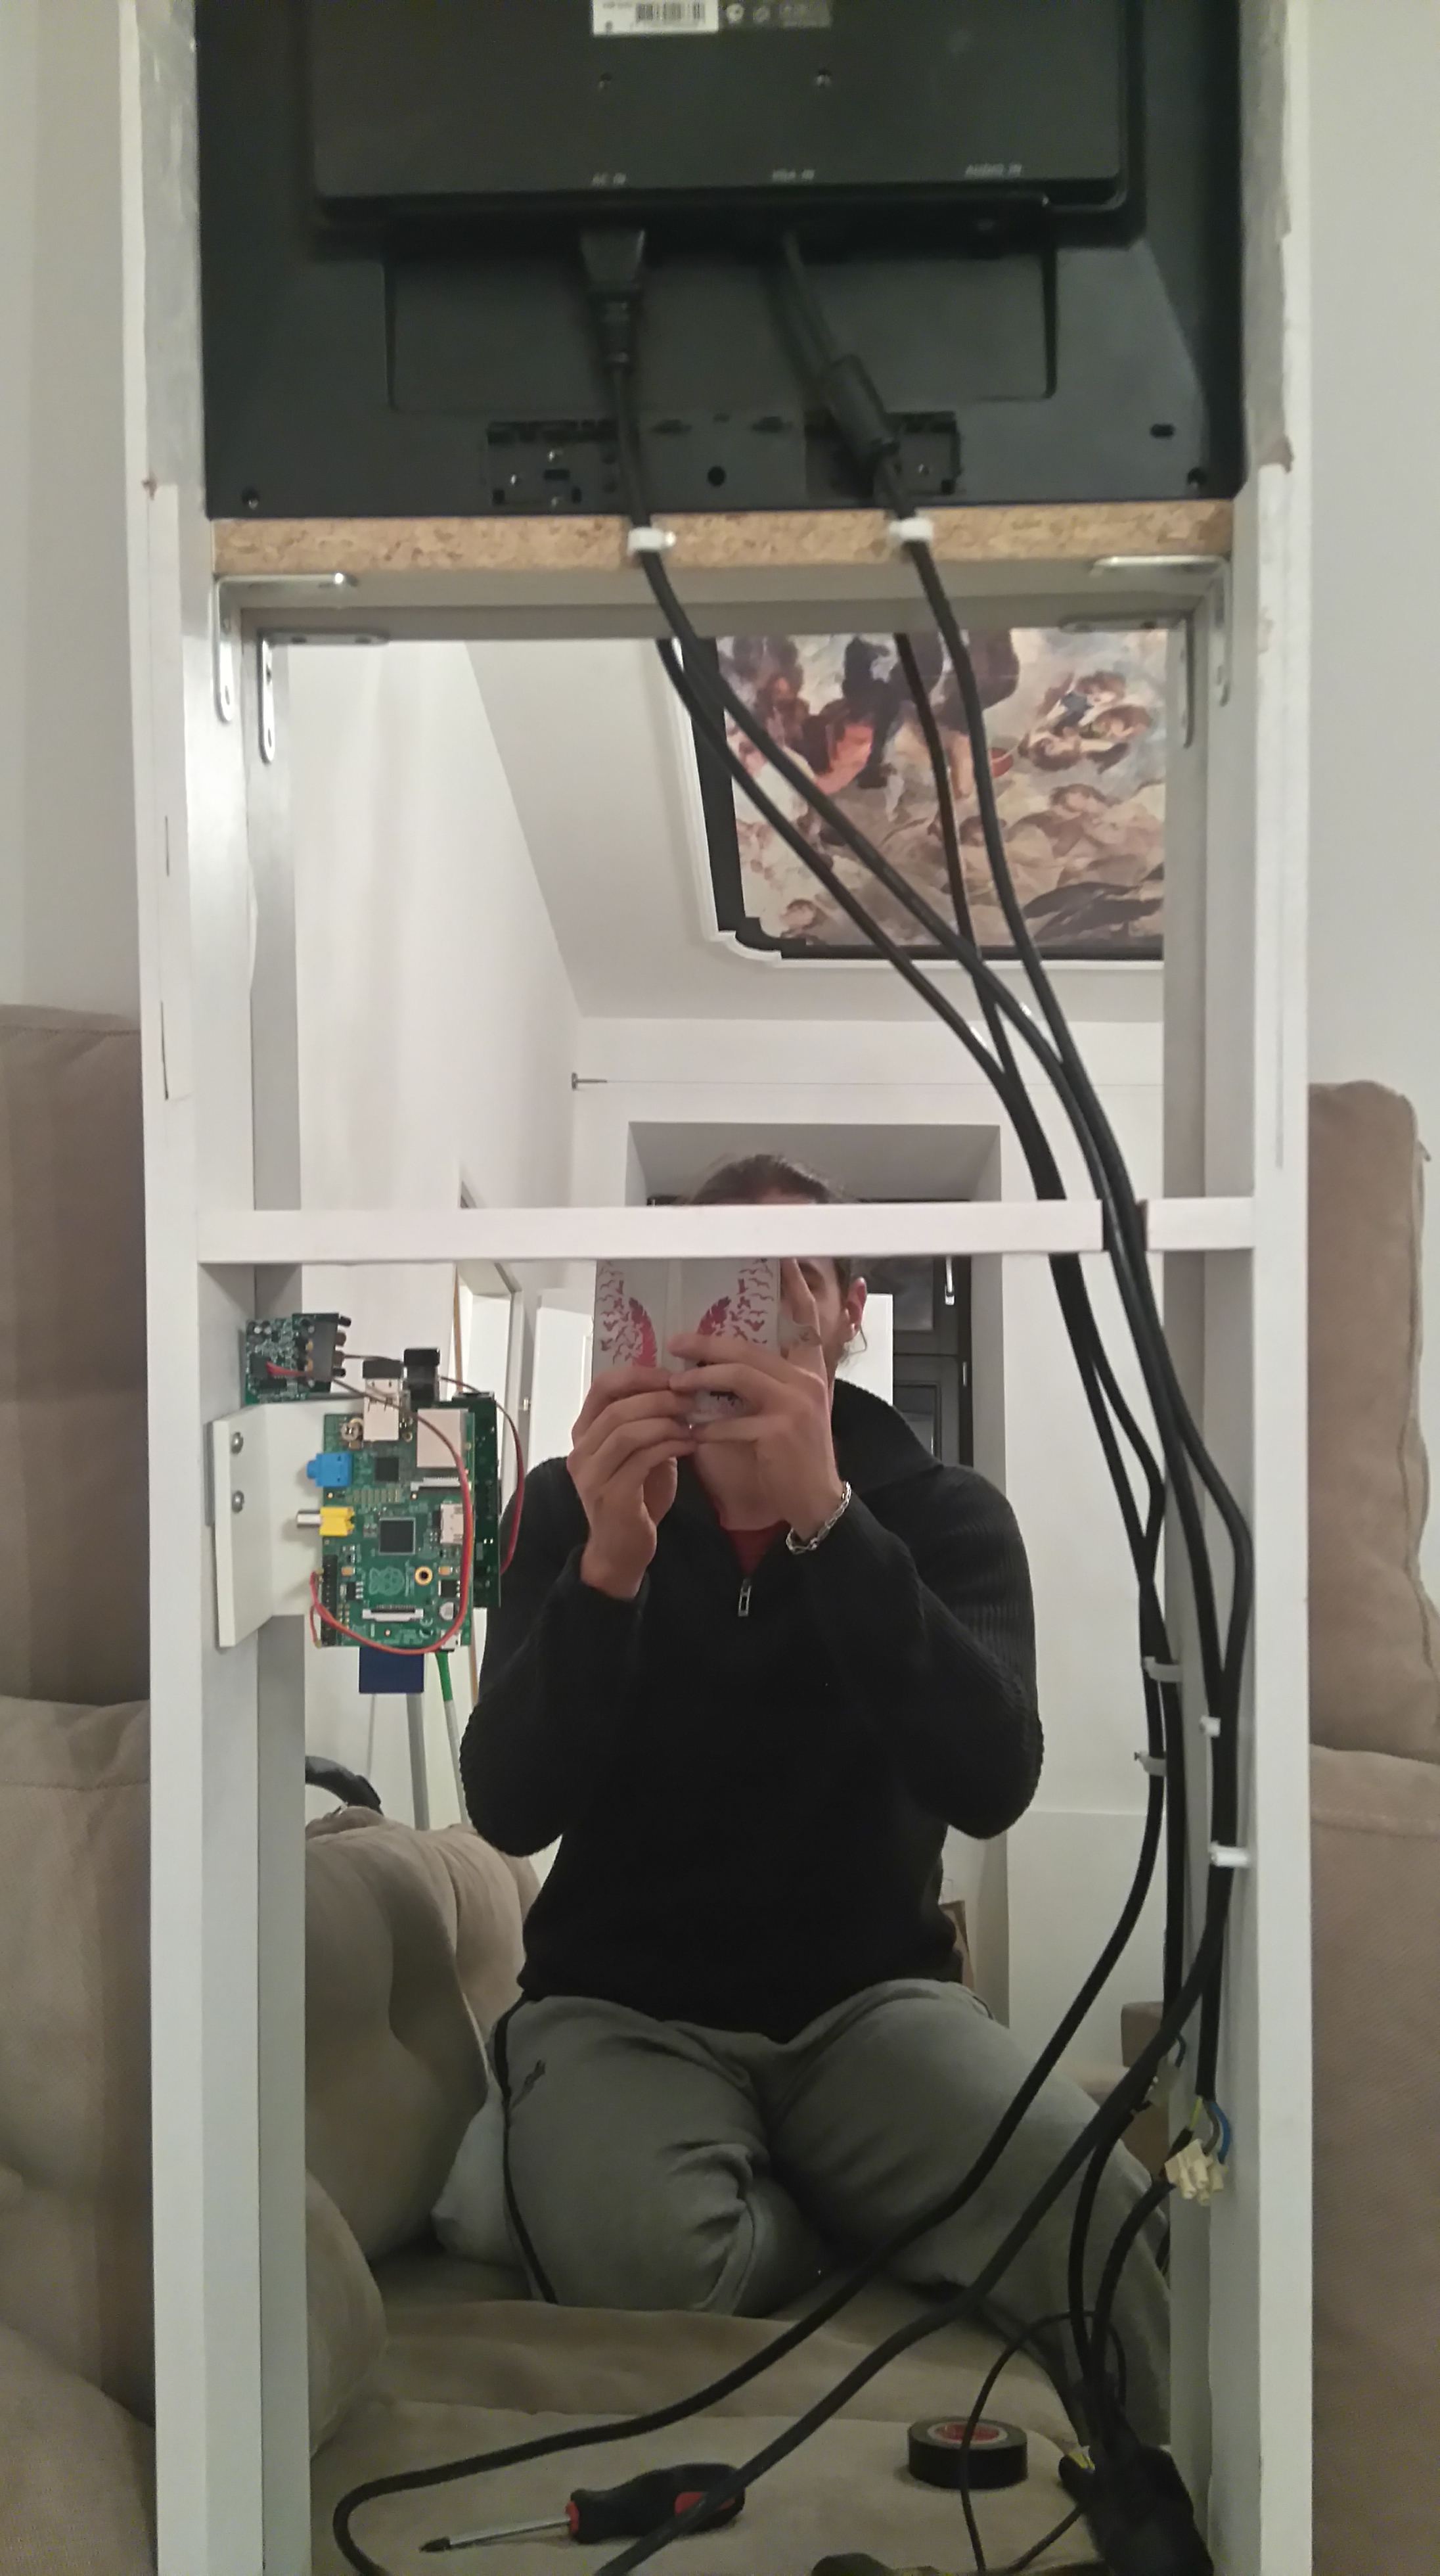
- An old LCD monitor
- Two-way mirror and a wooden frame for it
- PIR motion sensor, like one of these.
The Magic Mirror software is basically a web-browser displaying a delightfully designed php page on a local server running on R Pi. Here comes the fast run-through on how to set up Michael’s mirror.
- Set up a Raspbian (Jessie) on your R Pi, enable SSH, WiFi auto connect, and boot in Desktop mode (may the Google be with you).
- Set up an apache2 server on your R Pi and install php5 (if any of these doesn’t go smoothly, try some
sudo apt-get update

sudo apt-get upgrade. - Download Michael’s code from github repository into /var/www/html folder (
sudo git clone https://github.com/MichMich/MagicMirror). At this point, you might check the website he made by opening http://”R Pi IP”/MagicMirror. Looks neat, isn’t it? - Now adapt his code to match your private settings:
- open MagicMirror/calendar.php and put a calendar of your choice (change the URL in 4th row to your own iCal address)
- open MagicMirror/js/config.js and change the following lines:
var lang = 'nl'to the language of your choice (var langn = 'en'makes it english)- APPID to the open weather map api key of your choice
'q':'Baarn,Netherlands'to'q':'<city>,<state>'to city and country where you live.var feed = 'http://feeds.nos.nl/nosjournaal?format=rss';to RSS feed of your choice- List of the compliments
- Set R Pi to boot to a fullscreen web-browser. I used Midori as web-browser, and I edit /home/pi/.config/lxsession/LXDE-pi/autostart to include commands like
@xset s off
@xset -dpms
@xset s noblank
@midori -e Fullscreen -a http://localhost/MagicMirror/index.php
that will ensure that R Pi opens a Midori browser on your homepage in fullscreen mode right after it boots up. This is so called kiosk mode. It will also disable the screen going off eventually. You can also disable the cursor showing in the middle of your screen by installing unclutter (
sudo apt-get install unclutter). If needed, you can rotate your screen (if you use it in vertical mode) by adding"DISPLAY_ROTATE=1"in /boot/config.txt (I didn’t need it).
At this point you should have the R Pi running the Michael’s code with your private settings. Well done!
Adding a motion detector

There are many options of motion detection, and the most popular one is arguably a PIR sensor which is basically an IR sensitive JFET. So it senses your body heat when you move around. It usually comes on a board with a regulation circuitry, BISS0001 motion detector IC, and plastic cap that focuses the radiation. It has only one output pin that is logic high (3.3V) when the motion is detected and low (0 V) otherwise. Adafruit has a pretty helpful tutorial on these thingies.
You can use R Pi’s general purpose input/output pins (GPIO) to connect the sensor. I connected mine to 26th pin of the header which corresponds to the 7th GPIO port. Simple Python script can easily access those pins and read out the PIR sensor’s state. Here’s the script that I used:
#!/usr/bin/env python
import sys
import time
import RPi.GPIO as io
import subprocess
io.setmode(io.BCM)
SHUTOFF_DELAY = 60 # seconds
PIR_PIN = 7 # Pin 26 on the board
def main():
io.setup(PIR_PIN, io.IN)
turned_off = False
last_motion_time = time.time()
while True:
if io.input(PIR_PIN):
last_motion_time = time.time()
sys.stdout.flush()
if turned_off:
turned_off = False
turn_on()
else:
if not turned_off and time.time() &amp;amp;gt; (last_motion_time + SHUTOFF_DELAY):
turned_off = True
turn_off()
time.sleep(.1)
def turn_on():
subprocess.call(&amp;amp;quot;sh /home/pi/Documents/PIR/monitor_on.sh&amp;amp;quot;, shell=True)
def turn_off():
subprocess.call(&amp;amp;quot;sh /home/pi/Documents/PIR/monitor_off.sh&amp;amp;quot;, shell=True)
if __name__ == '__main__':
try:
main()
except KeyboardInterrupt:
io.cleanup()
The script basically reads the sensor state from the 7th GPIO pin and depending on its state and the time since the last activity it turns on or off the monitors. Now, this is an interesting part: monitor is turned on/off by calling a shell scripts monitor_on.sh and monitor_off.sh. Each of these contains simple tvservice command and everything would be easy-peasy if there wasn’t that HDMI/VGA babble. More on that a bit later.
When I tested the PIR sensor for the first time it worked like a charm. But when I built it in a mirror there was a problem – a sensor output was always in high state! I’ve lost a lots of nerves trying to find what was the reason for malfunction. At some point I noticed that sensor works normally again when the WiFi dongle is switched off. I realized that the cables connecting sensor with the Pi are picking up some WiFi interference as they are placed quite close to the dongle. The cables behave like some freaking antennas! Aaargh!
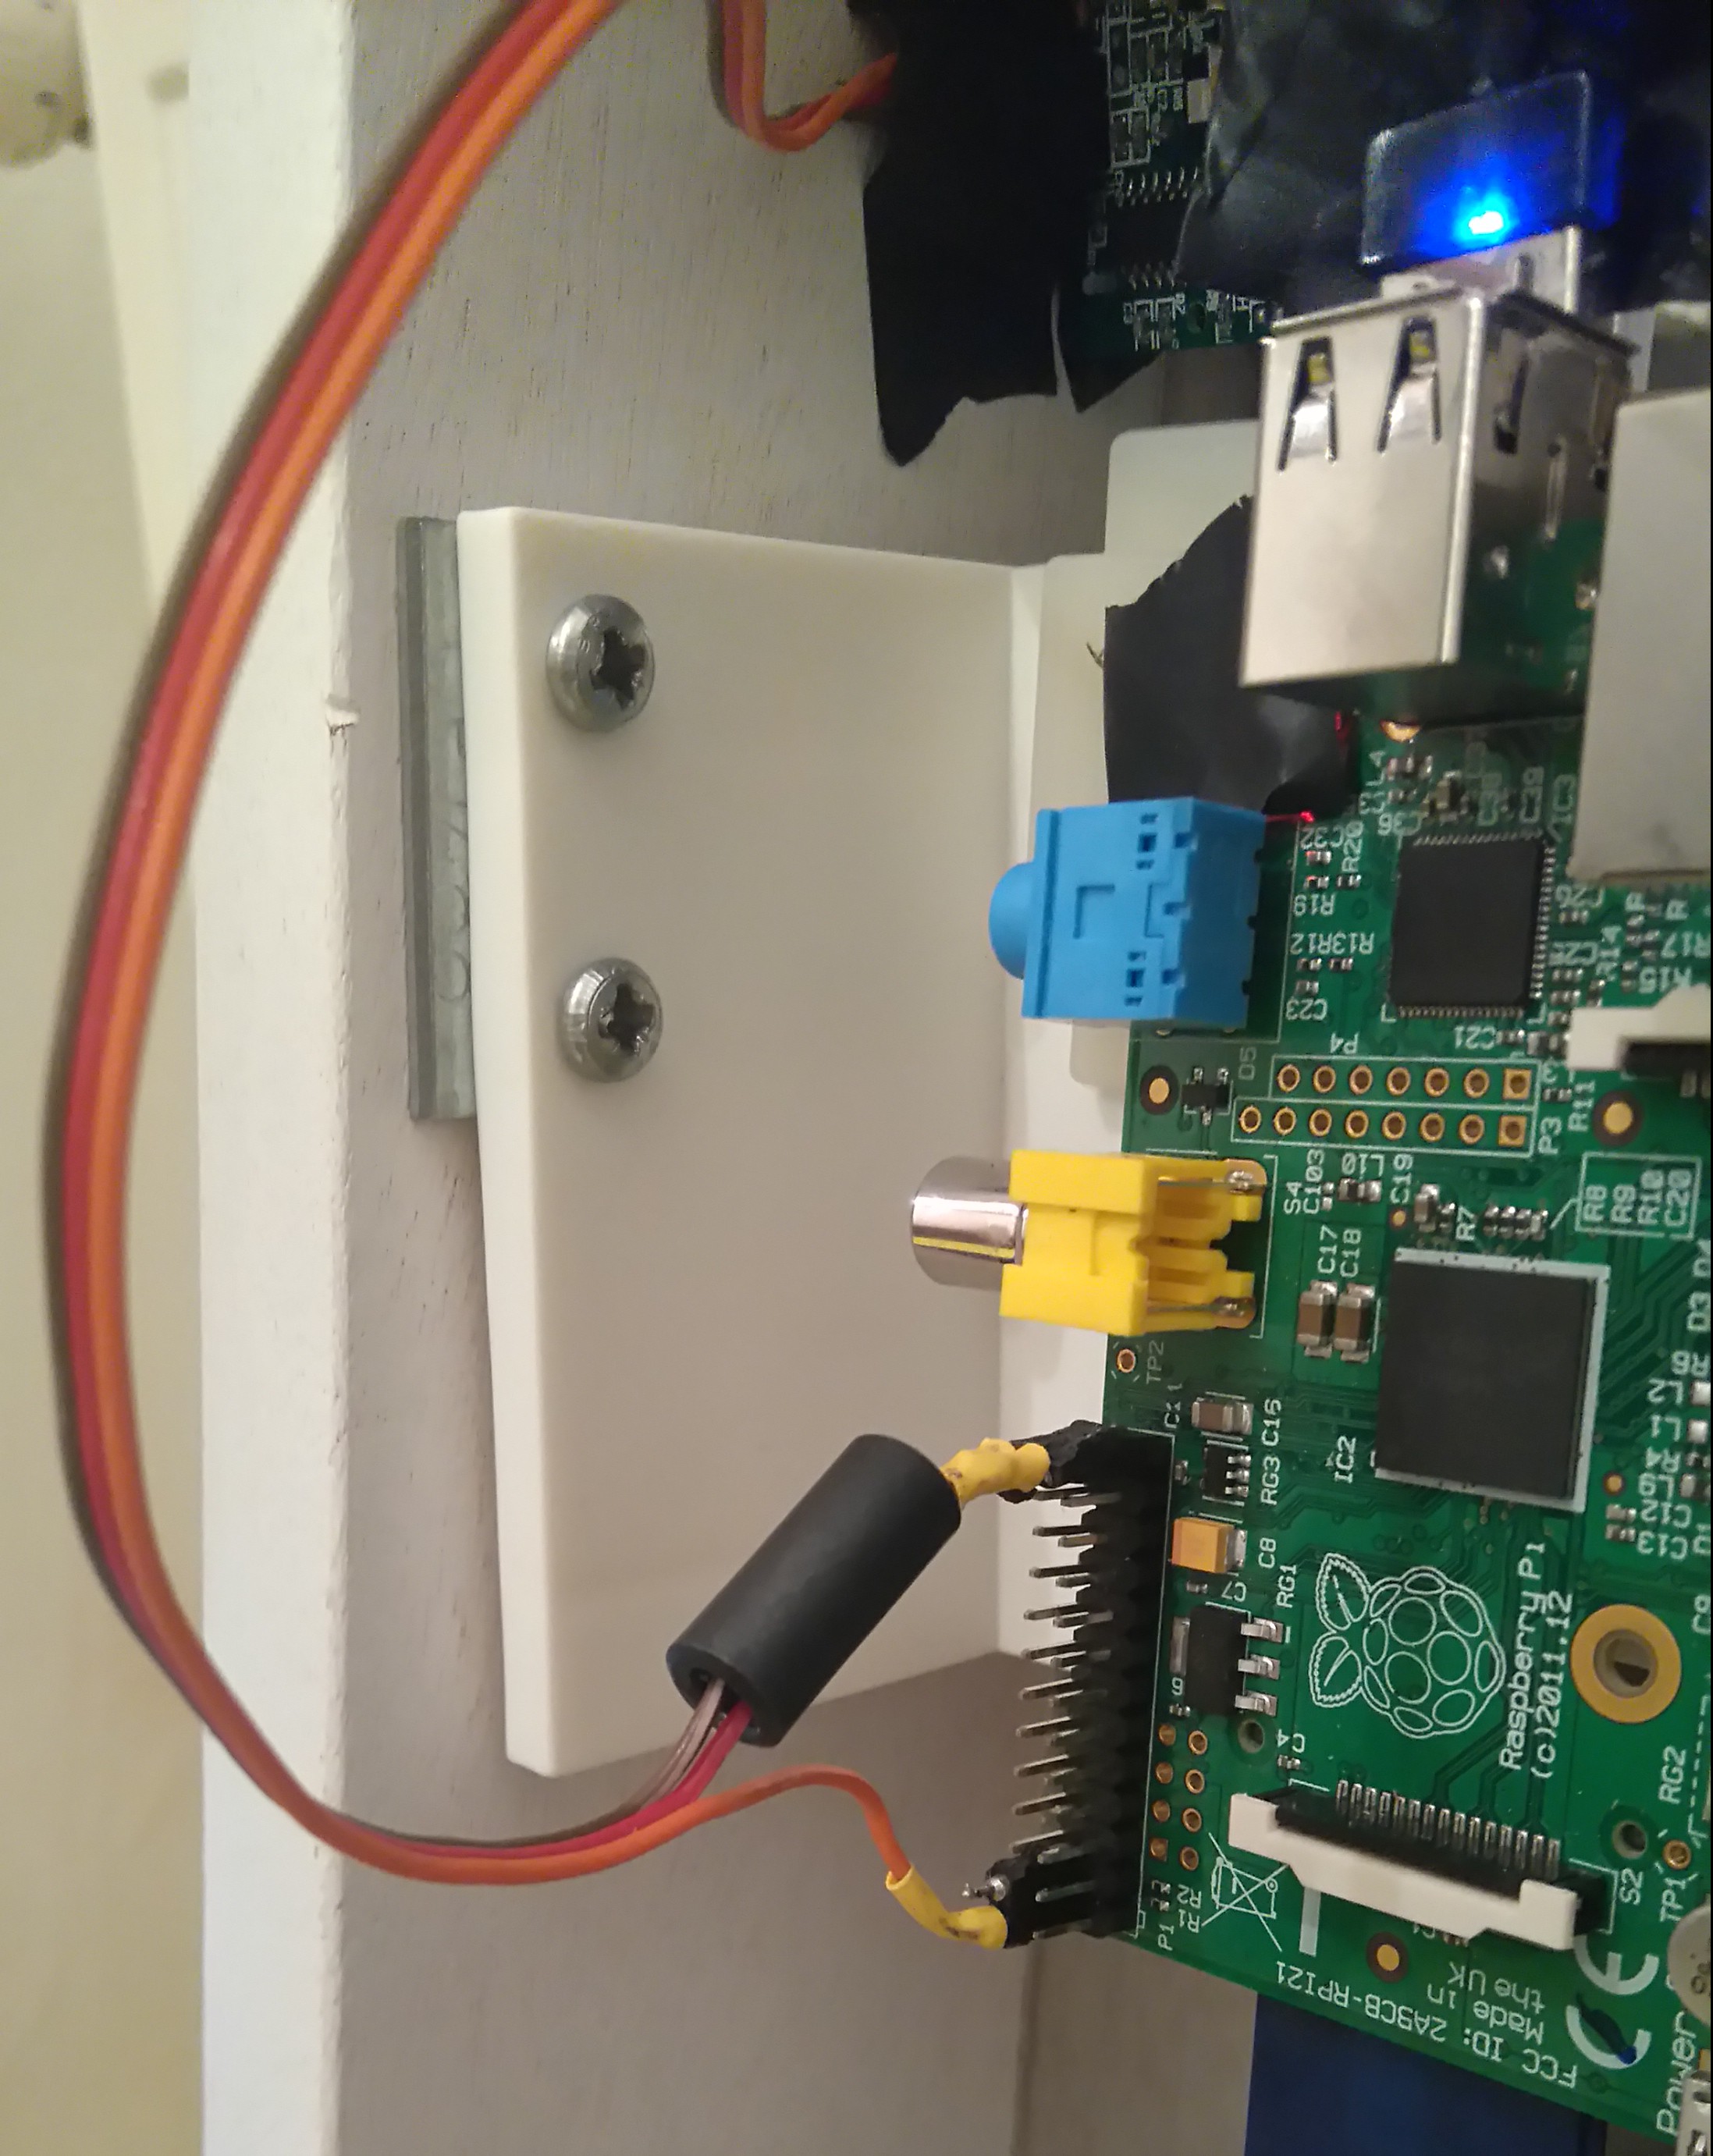
How to solve it then? One convenient way is a ferrite bead – a ring of ferritic material around the cable that absorbs most of the high-frequency radiation. Where to find one? It’s Sunday afternoon, ferrite bead stores are all closed. Look around the house, find a smartphone charging cable…what’s that bump next to the connector (that cylindrical widening on the cable)? Cut it out, strip it off, OMG it’s a ferrite bead!! Woohoo! Put my cable through it, just like on the photo on the right, and what – interference is gone and sensor is read normally again! If it doesn’t work try: multiple windings around the bead, different material type or maybe some ceramic capacitors to the ground next to the connectors.

Configuring the HDMI interface
Back to turning the monitor on and off. So, the Pi has a HDMI port while the monitor I got has a VGA. In normal operation HDMI-to-VGA adapter would be enough, but here we need to take a special care on few things. First, open the /boot/config.txt and edit few things, like set hdmi_force_unplug=1 that will force the HDMI output on R Pi even though there is no HDMI device on the other end. You may want to change few other options to define desired resolution or audio output. Other cool HDMI settings are listed here and don’t forget to set the resolution (hdmi_mode) that your monitor supports.
One additional thing is turning monitor back on after it’s been shut down. Simple sudo tvservice -p won’t do the job – you have to re-enable the frame buffer and add the following code fbset -depth 8 && fbset -depth 16. Finally, monitor_on.sh script should look something like this
#! /bin/bash
sudo tvservice -p && fbset -depth 8 && fbset -depth 16
The only thing left is making the python script started as soon as Pi is turned on. To make this, I included a command
@reboot python /home/pi/Documents/PIR/pir.py &
into the cronetab (& at the end means it will be background process).Reboot the Pi and if everything’s done right you should have your mirror working in something like on this video:

I apologize for being so new to this, but everything I try to edit I do not have permission to do so and is read- only
seems like a user issue.. Did you forget to use “sudo” in every command? If it didn’t work you may wanna try the user permissions (take a look here: https://www.raspberrypi.org/documentation/linux/usage/users.md)
Seems I need to learn a little more about the OS. I have been able to figure most of this out without any prior knowledge but I keep trying to do things the Windows way. Essentially I’m just going into the file manager, opening the files and trying to edit them.
Thanks for the writeup! Could you please tell me where exactly you bought the PIR sensor from and what did you use to connect the wires from the sensor to the pi?
Definitely, I bought them on ebay,can’t find the link now, though Adafruit sells them also and probably has a better customer service. I connected it via simple 3-wire strip cable, soldered on 100mil header, really nothing special.
It seems the calendar.php has moved to the controllers folder on https://github.com/MichMich/MagicMirror
Here is what I did, everything works except for my google calendar.
1. Downloaded the magic mirror zip from this site
JS>CONFIG.JS
2. added ‘en’ language on lines 2 and 13, ‘Toronto,Canada’ on line 10, and my API code for weather on line 14
3. removed the url from the news code on line 41 so it doesn’t load news
4. swapped in my private ical google calendar url
CONTROLLERS>CALENDAR.PHP
5. swapped in my private ical google calendar url on line 3
CONTROLLERS>FUNCTIONS>GZIP.PHP
6. added the extra parenthesis on line 33
INDEX>PHP
7. removed div class=”news medium” from line 20
Everything works except my calendar still wont load. I have the code on:
http://www.magicmirror.xcellwebdesign.com
Any help is much appreciated 🙂
hey, I’m not actually familiar with js nor php so I might not give you a very helpful answer but so far I see it putting an url of your iCal config.js line 38 should be enough. I don’t think that changing calender.php is good. Try it out and please let me know if you manage to fix it.
I tried switching it back to the original but had no luck. Here is what my controllers>calendar.php file looks like:
Hello there thanks for the guide post! I plan on following this post to make a similar mirror as a gift.
I have two questions wondering if you can answer them.
1. What was the thickness of the two mirror that you used?
2. I am assuming that you monitor is shorter than the length of the mirror.
When the monitor is on, can you even notice that the monitor is shorter than the mirror such as some outline or anything?
Thanks again!
Thanks for compliments.
1. Thickness of my glass was 6mm, though there are 3mm glasses available
2. Well, if you take a really deep deep view you can see edges of monitor reflecting light, but in normal mode it’s invisible, just as you can see on the photos.
Yes I could not tell from the pictures at all. What was the size of the monitor that you ended up using?
I was thinking of using at 27″ inch monitor but may go with at 22″-24″ to save money.
Thanks for the write-up one of the best interfaces i’ve seen on a Magic Mirror. It seems that Holiday api isn’t working on my setup. Am I missing something? Also, have you ever thought about potting a weather map on the mirror as weel?
It could be that you do miss something: someone here commented earlier that original repo has been changed and calender.php comes in the separate folder now. This person also had troubles with it. Could be that Michael’s new version has some bugs. Unfortunately, I’m no authority on php to advise on what to change
Great tutorial! Could you please tell us where did you find the mirror?
In a small glass workshop in my hometown, and they do not have a website or something to make them more accessible. If you live in Vienna, Austria, I could provide you their address. It was still expensive, about 114€ for that matter.
I got everything beside a frame.
Did you order the frame or did you made it yourself ?
Can you post some detailed photos of it, how it holds the mirror
thanks
I ordered it..we had some reconstruction works at our apartment so I asked a carpenter if a wooden frame 118 x 38 x 8 cm would be a trouble to make. How does it hang..good question, I improvised with some spare materials, it s basically an L-shaped piece of iron with the hole. I took two of them and screwed them inside of the wooden frame. Then, I drilled two holes in the wall and screwed two big bolts upon which I later stacked the frame with L-shaped iron pieces. I don’t know how helpful this lousy illustration is, but unfortunately, I didnt take any photos. And sorry for using word “screwed” too often 🙂
Danke! Thats fine. So I will first go and ask a carpenter for the frame maybe even with notches (de: Nuten). If this this is to expensive I will try find a L-Shaped piece of wood and hold the mirror like you with some icon pieces. I really want to try to make it as thin as possible, about 5cm depth.
I will post the results here 😉
I indeed built one. And I also documented it. Especially the process of building the frame may be interesting for your. (Its in german but you can translate it with google + lots of pictures)
http://robinhenniges.com/de/magic-mirror-bauen-teil2-rahmen
Pero, could you please take a look at this forum where we build smart mirrors?
http://mirrormirror.tech/t/help-with-pir-motion-detection-please/167
basically, i tried to follow your tutorial as close as possible and still failed. there are some details that you skipped and theres no way i can know what is wrong. please help
there are some steps you skipped. it is really hard for a newbie to follow and i tried my best. could you take a look to see what i did wrong? http://mirrormirror.tech/t/help-with-pir-motion-detection-please/167
Hello, thanks for writing and sorry for the late response. I checked your steps and understood that you have troubles with turning monitor on, right? In that case you should check your monitor port (HDMI or VGA) and keep in mind that R Pi doesn’t work the same for both of them. For HDMI it is rather simple, because R Pi has native support for HDMI, and it can be done as explained here: https://glframebuffer.wordpress.com/2013/08/28/raspberrypi-how-to-turn-off-hdmi-from-raspberry-pi/. However, R Pi doesn’t have native support for VGA and you have to turn couple other options that your HDMI-2-VGA adapter will understand, like explained here: https://www.adafruit.com/products/1151, and also you need to use command: sudo tvservice -p && fbset -depth 8 && fbset -depth 16
I am also having issues getting my monitor to wake back up and look normal. When using the command “sudo tvservice -p” monitor wakes but no image. When using “sudo tvservice -p && fbset -depth 8 && fbset -depth 16” the monitor wakes up and I see an image but resolution and colors are all messed up. I have a straight HDMI cable from PI to monitor and my monitor EDID is being reported as 1920 x 1080 @6oHz. Wondering if the fbset depth of 8 & 16 need to be different values based on my monitor’ resolution…but so far unsuccessful in figuring out. Any suggestions?
Thanks in advance….
Ended up figuring this out. Had to use the following for my monitor_on.sh
#! /bin/bash
sudo tvservice -p
fbset -g 1920 1080 1920 1080 32
Hi and thank you for that perfect instructions. Everything works fine up to now. I got two examples of different glas which I just testet. I also tested the PIR sensor behind the glas and it did not work. Without glas everything works perfekt, with the glas the PIR does not recognize the motion anymore… And when I look at your pictures, it looks like the PIR senses trough the glas. Is that correct? Did you do any “trick” that it works?
Thank you for your answer.
Best regards
Michael
Hello Michael, thanks for writing. Nope, there was no trick, though I had some troubles with the PIR working behind the mirror in the beginning. I thought that glass IR absorption was too high so I tried to play with potentiometer to adjust sensitivity and pulse width. In the end I made it “satisfyingly” enough, though it does not respond very fast all the time. If you find some other solution, please keep me updated.
Hello,
where did you place the PIR-Sensor? I tried it myself and it doesn’t work behind the mirror.
Best regards
Lars
Hello Lars, thanks for writing. As I said to Michael just above, I had some troubles with the PIR working behind the mirror in the beginning. I thought that glass IR absorption was too high so I tried to play with potentiometer to adjust sensitivity and pulse width. In the end I made it “satisfyingly” enough, though it does not respond very fast all the time. If you find some other solution, please keep me updated.
Added the motion detect based on this post. Thank you! I couldn’t get the PIR to work behind the glass, so I mounted it on top. Looks ok – also added the Alexa Voice service, so now I have a talking mirror. 🙂 I also played with replacing the news headlines on the bottom with family photos, but it was too dark to be practical. your mileage may vary.
Hello JP, this sounds great! I’d be happy to see it, if you have posted it somewhere online.
h[tt]p://other.bagpipez.com/Projects
I plan on making this over summer. Would it be possible for your mobil to tell your mirror that you are in the house and to start the PI so it inly needs to power the screen using the PIR? I am thinking something like Tasker talking to your WIFI
I wish you a lots of luck! I see no reason why not – there surely are some WiFi apps you can make that enable communication between your smartphone and R Pi, though I’m not familiar with them.
Thank you for the blog entry. I am trying to add PIR to switch on/off the monitor. I have a PI1. Can you please show the connection details. which pin on PIR connects to which one on GPIO. and what ever the rest of hte steps are.
There you go: https://www.raspberrypi.org/learning/parent-detector/worksheet/, here’s a very nice info you need to get started with PIR.
Considering the discussion on the location of the PIR sensor above, it would be helpful if you could share the tickness and material (glass or acrylate) of your mirror. Considering the significant absorption of IR radiation, thinner is better and it will help others to get a PIR behind the mirror working. Many thanks in advance!
Hi I am also wondering about how the PIR will work from behind 3mm thick acrylic, this one: https://www.amazon.com/Acrylic-See-Through-Mirror-3mm-Transparent/dp/B01G4MQ5OW/ref=sr_1_1?s=industrial&ie=UTF8&qid=1491769680&sr=8-1&keywords=3mm%2B2%2Bside%2Bglass%2Bacrylic&th=1
Anyone have any problems? Considering if I need to mount the PIR outside of the wood frame.
Thanks!
I know this post is old, but how much would something like this cost to build, roughly?
hey, i remember exactly: mirror itself 190€, frame 50€ but the woodmaker was friend, Rpi and peripherals cca 50€.
My material cost were 271 €.
Hi, is a curved magic mirror display possible?
yes!
Does this method turn the display signal on and off, such that it behaves in a similar manner as if you were unplugging and re-plugging the HDMI cable? Or does it alternate between displaying the mirror and displaying a black screen? My monitor displays “Check Signal Cable” when I unplug the HDMI cable, which wouldn’t be nice to look at while the mirror is “off”.